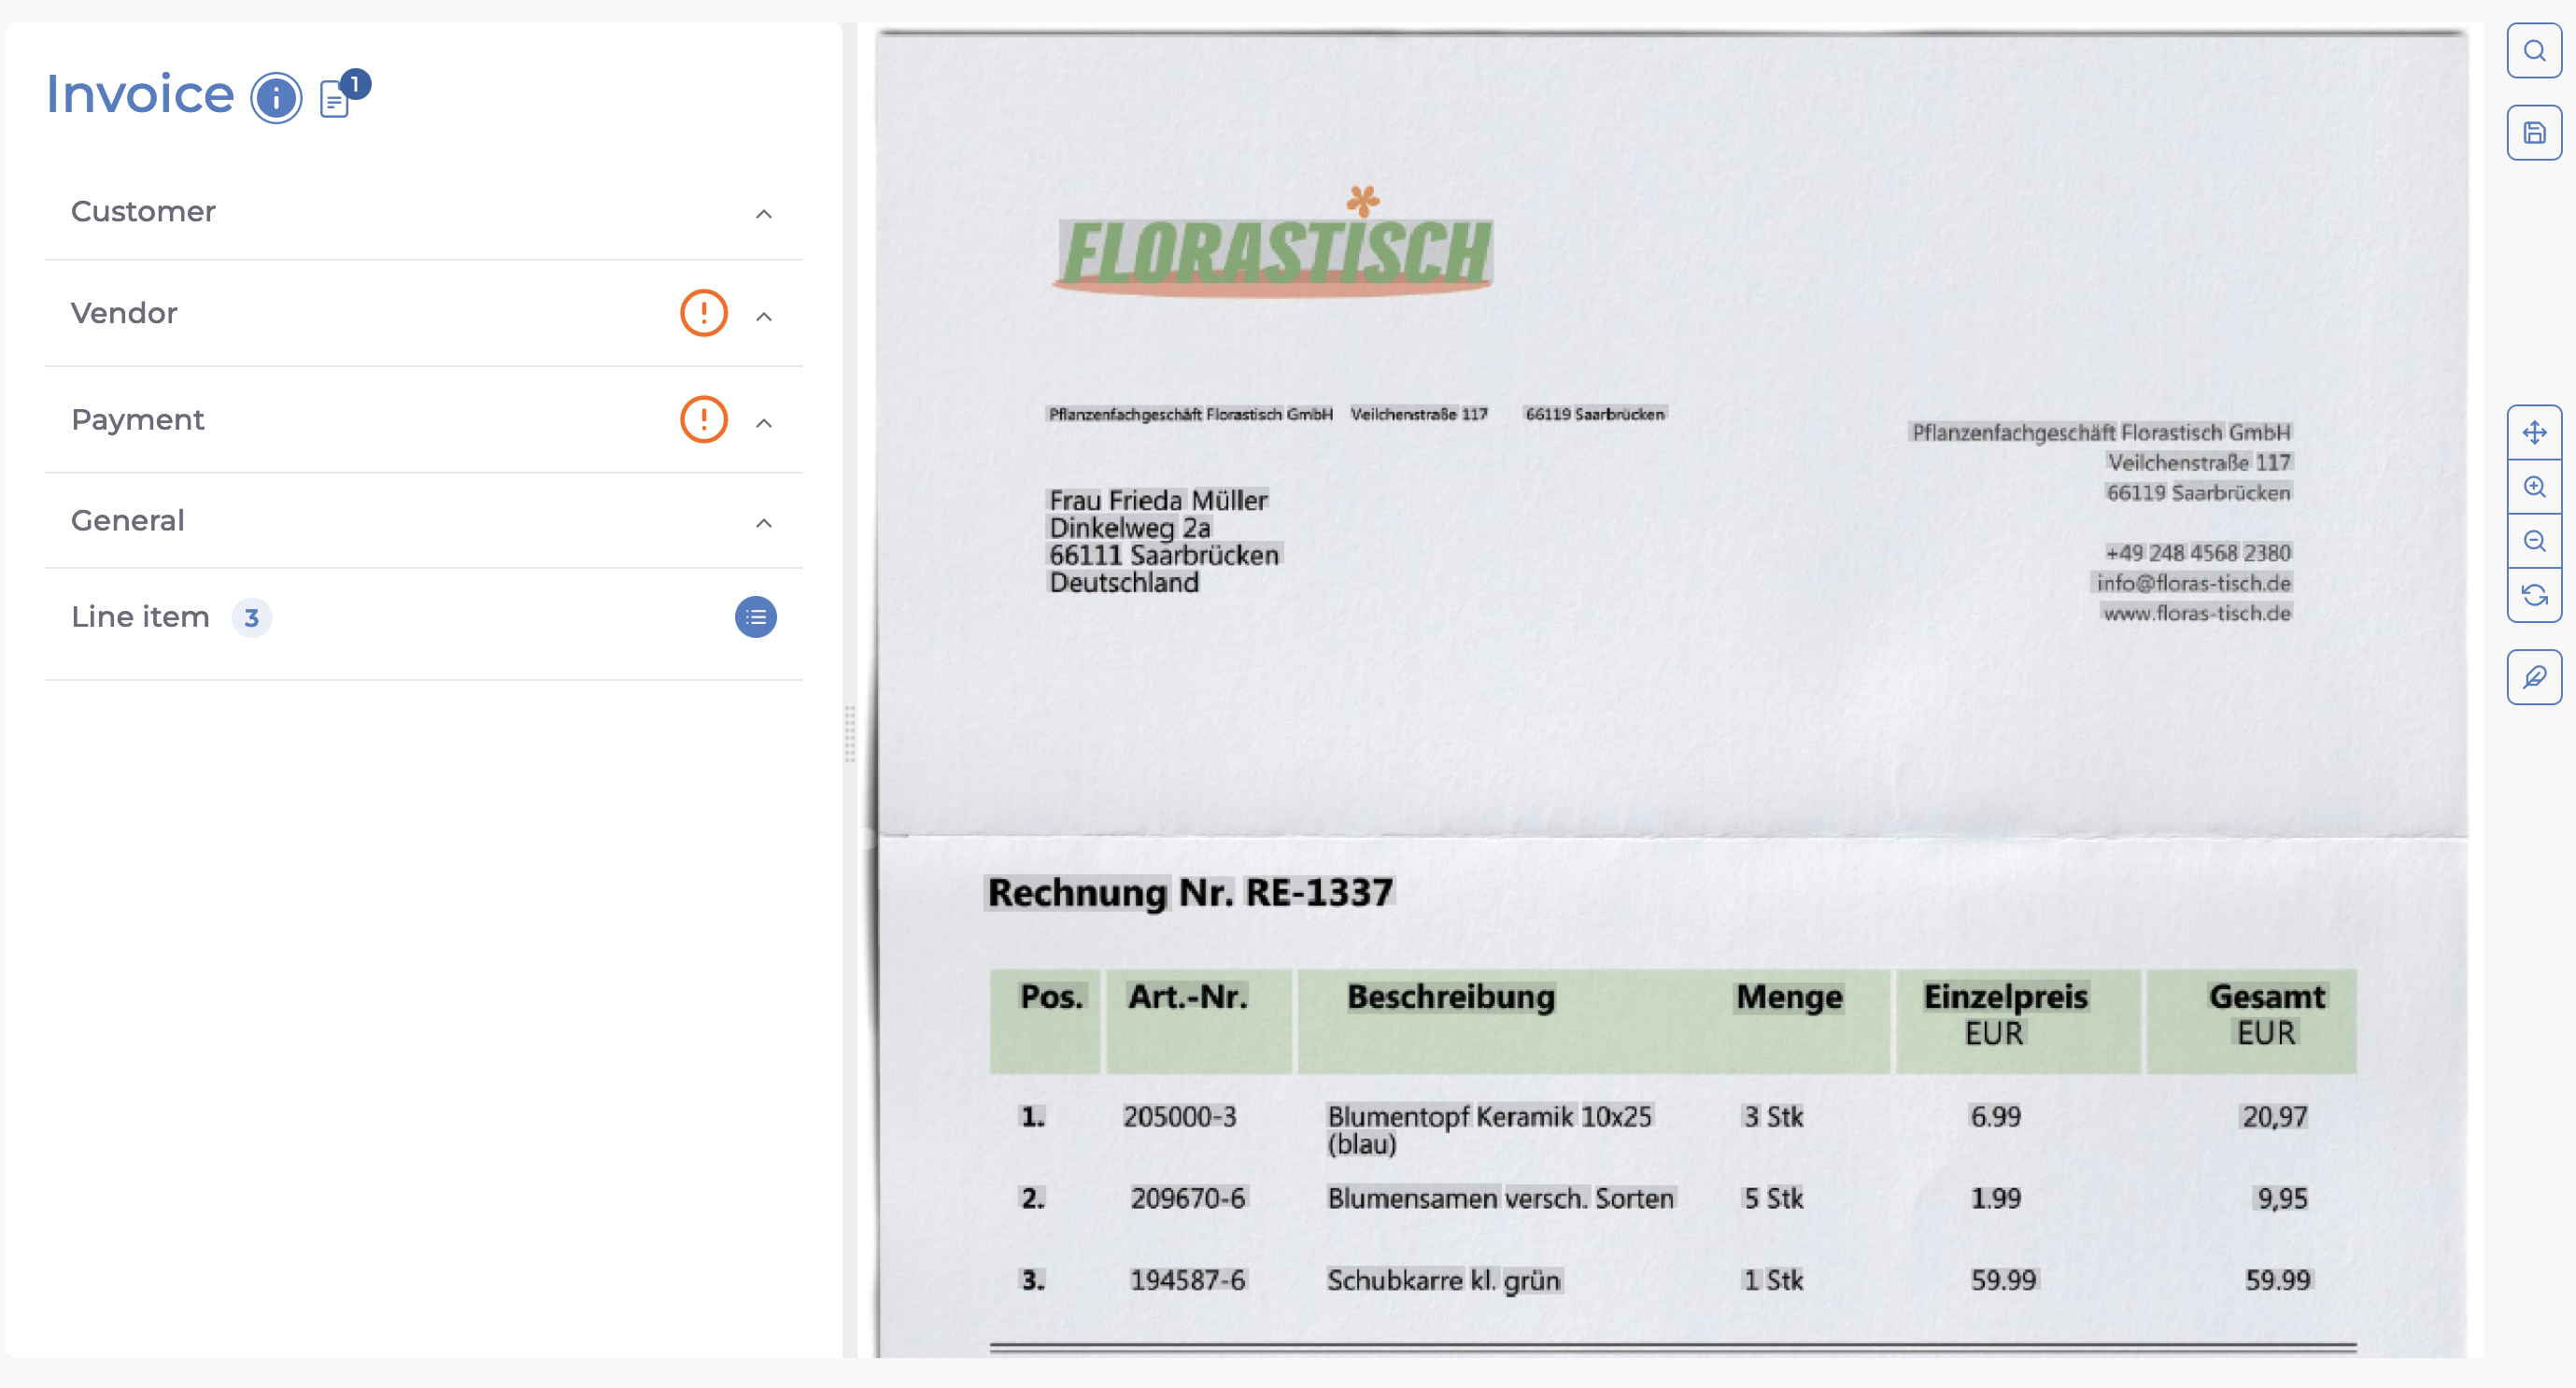
Verification#
Automatic Verification#
While we provide state-of-the-art extraction results, we cannot guarantee that our AI is perfectly accurate. Therefore, we encourage you to implement additional cross-checks of our extractions against your business data as outlined below:
Cross-Checks#
The following three cross-checking approaches may be applicable for your business:
- Master Database: If you have a database with core data, you can match our extractions against it. One could for example:
- Do an exact match between the tax ID extracted by the natif API and the tax IDs stored in a database containing all of your vendors
- Do a fuzzy match between the vendor name extracted by the natif API and the vendor names stored in a database containing all of your vendors
- Check if the items we extracted from your invoice can be found in your ordering system
- Confidence: We do not just provide the values we extracted, but always pass along a confidence value. The closer this value is to 1, the more certain we are that we extracted the correct value. Thus, you can decide that you trust our extractions if they have reached a minimum confidence threshold.
- Logical Checks: You can implement simple rules that you expect to be true based on your use case. E.g., you can check that a certain identifier matches a known pattern. You could also decide that you do not want to fully automatically process documents if the risk of doing so would be too high (let's say invoices with a gross amount of more than 10,000 Euros).
Combining Several Verifications#
Ideally, you combine several different verifications across multiple extraction fields.
As a positive example, where verification helps to increase the automation rate, consider an invoice where the vendor's address, IBAN, and VAT ID were extracted with high confidence and are contained in your master database. In that case, having a low confidence for the vendor name probably does not matter, as you already have a strong indication of who sent you that document.
As a negative example, illustrating how combining several verification methods could reduce the automation rate and save you from profit loss, consider a high-risk document (according to the due payable amount) where the extracted IBAN has high but not perfect confidence and the VAT ID is not contained in your database. In that case, you probably want a human to manually check the document.
Strictness of Verification#
Naturally it depends on your use case how strictly you want to check our output. If you want to grant a loan of a million Euros, you probably always want a human to verify the information we extracted. Note, however, that this verification can be done much quicker than fully manual processing, as all fields can be pre-filled by our AI.
If the risk is low (let's say an invoice of 2 Euros), you might want to process it fully automatically even if you do not fully trust it, since the effort of manually checking exceeds the cost of manually checking the document.
Outcome of Verification#
Overall, your checks can have two outcomes:
- The document can be processed fully automatically
- The document should be verified manually by a human
Human Verification#
If you decide that a human should manually inspect the outcome of our AI, you can either use your own interfaces or embed our interfaces into yours.
Using Your Own Existing Interfaces with our Verification API#
Using your own existing interfaces obviously has the advantage that your employees can work the way they are used to. Simply pre-fill all input boxes with the values our AI extracted for you and ask your employees to verify them. To make their lives easier, you can of course highlight fields were the automatic verification failed in red and fields where the automatic verification succeeded in green, such that less manual work is needed.
To facilitate integration of our processing capabilities into your Human-in-the-Loop verification process, we provide a verification endpoint in our processing API. In order to verify a result, use
POST /processing/results/{processing_id}/{result_type}/verification
with processing_id being the job id returned by the processing endpoint, and result_type being a type of result that your workflow supports.
For example, for classification workflows, you could set result_type=classifications, for extraction workflow you would set result_type=extractions,
while when verifying results of splitting workflow, you would set result_type=extractions.
You may have a look at your workflow's OpenAPI documentation to see which result types are supported.
When sending the POST request, set the request body like this:
This will mark the document as verified. Now, in both cases - Stand-Alone interface or verification API - the processing of results can continue by checking the verification status of the document with the same endpoint using a GET request:
GET/processing/results/{processing_id}/document-splitting/verification
This will return a positive response when the document is verified:
If the document is not yet verified, the response will be:
Using the natif.ai Stand-Alone Interface#
Since many of our customers do not have the resources to build their own interfaces, we made it easy to use our interfaces and integrate them into your workflow.
This works as follows: When the outcome of your automatic verification is that a human should verify the information
- Create a share token by passing the document_id (uuid) and an expiry_at (date) to the route /sharing/documents (see the documentation). Thus, you basically use your existing authentication (bearer token or API key, see the docs) to create a token with which only a single document can be accessed (until a certain date). This makes the document sharing more secure, as the token does not grant access to anything but this single document. The response of this POST request contains a token to be used in the next step.
- Using this token and the known document_id, build a URL with one of the following patterns, depending on the workflow category:
- for document splitting workflows: https://platform.natif.ai/workflows/document-splitting/stand-alone/<document_id>?token=<token>
- for document classification workflows: https://platform.natif.ai/workflows/document-classification/stand-alone/<document_id>?token=<token>
- for extraction workflows: https://platform.natif.ai/workflows/extraction/stand-alone/<document_id>?token=<token>
-
Open this url in any browser and review the document.
-
To verify the document manually, click on the Save and mark as verified button.
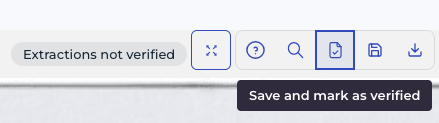
After saving, the results are marked as verified. The verification status will be available for automated monitoring through the Verification API as described above.

You may then fetch the verified results from the Processing API for automated downstream processing.
Verification for Extractions#
For extractions, the natif.ai interface provides several configurable parameters for verification.
The query parameter extraction_confidence sets the minimum confidence threshold for an extraction field. Any extraction field that is below the confidence threshold is highlighted with a warning. The default value for this parameter is 0.25.
The query parameter warning_color sets the color of the warning for low confidence extraction fields. It supports the following values:
- a hex color. This must be properly escaped. For example, for the hex color
#03f, usewarning_color=%2303f. - an rgb color. For example
warning_color=rgb(4, 255, 27) - one of the following pre-set colors:
- warning (default)
- error
https://platform.natif.ai/workflows/extraction/stand-alone/<document_id>?token=<token>&extraction_confidence=<your_confidence_threshold>&warning_color=<your_preferred_color>
Verification for Document Splitting#
For document splitting, the natif.ai stand-alone interface offers a quick way to review split points below a certain threshold.
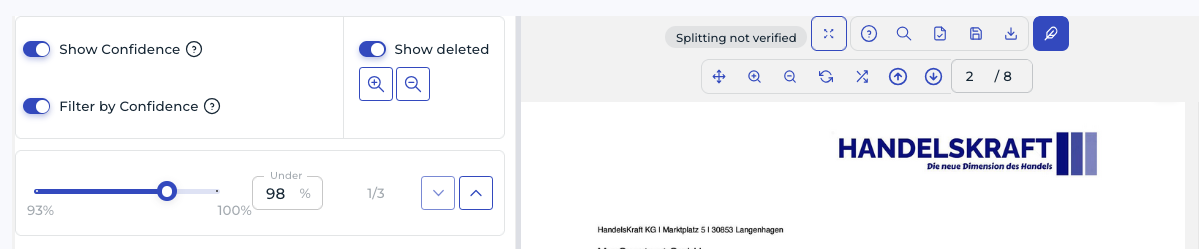
The query parameter split_confidence can be set in the url to directly spawn the stand-alone interface with proper confidence threshold selected. This allows to review at scale, as you can via code generate links to open, where you are already logged in and have the threshold set as per your requirements.
https://platform.natif.ai/workflows/document-splitting/stand-alone/<document_id>?token=<token>&split_confidence=<your_confidence_threshold>
To assist verification, the platform assess the confidence of your trained model and recommends uploading more data if needed to enhance its reliability.
Integration via iFrame#
Caution
Due to security restrictions such as X-Frame-Options and Content-Security-Policy, embedding parts of our platform via iFrame requires domain whitelisting. Please contact your Customer Success Manager to request access for your domain
Probably you do not want to break the user experience for your employees, i.e., you want to prevent them from switching between your system and a browser all day long.
Therefore, we recommend that you open the above URL within an <iframe> in your application.
To make the integration even more simple, our application listens to events.
Thus, you can place a button outside of the <iframe> that does the following:
- Save within our application by sending a save-document event
- Re-fetch the updated results from our API and trigger automatic processing
A minimal working example looks as follows:
<div>
    <h1>
        My website
    </h1>
    <iframe
    id="iframe"
    style="width:100%!important; height:80vh!important;"
    src="https://platform.natif.ai/workflows/extraction/stand-alone/<document_id>?token=<token>"
    ></iframe>
    <br />
    <button onclick="myCustomSaveFunction()">My Save Button</button>
</div>
<script>
    function myCustomSaveFunction() {
        const frame = document.getElementById('iframe');
        frame.contentWindow.postMessage("save-document", 'https://platform.natif.ai')
        // trigger fetching of data and automatic processing
    }
</script>
If you do not want to show the cookie banner, you can accept cookies by passing the URL parameter "allowCookies=essential" or "allowCookies=all", resulting in an overall URL